

API Keys and Webhooks in FoxReach (1 min)
Before you start
Everything here lives under Settings > Integrations, and two rules apply throughout. API keys are workspace-scoped: a key belongs to the workspace you create it in, and every request made with it acts inside that workspace only, so two client workspaces need two keys (the workspaces guide explains the model). And creating or revoking keys needs the owner or admin role. The screenshots come from a demo workspace called FoxReach Academy Demo. If you are brand new, the getting started guide gets a first campaign running; come back here when you want to connect FoxReach to something else.Step 1: Open Settings > Integrations > API Keys
Click Settings in the sidebar, then the Integrations tab. It is a stack of collapsible sections: API Keys, MCP Integration, Tracking Domain, Webhooks, and Event Log. Expand API Keys. A banner titled API Key Authentication states the two facts that matter: keys authenticate requests to/api/v1/ endpoints, and you send the key in the X-API-Key header. Below it is the list of keys in this workspace. Each card shows the key’s name, its prefix followed by three dots, a badge per scope, the creation date, and when it was last used.
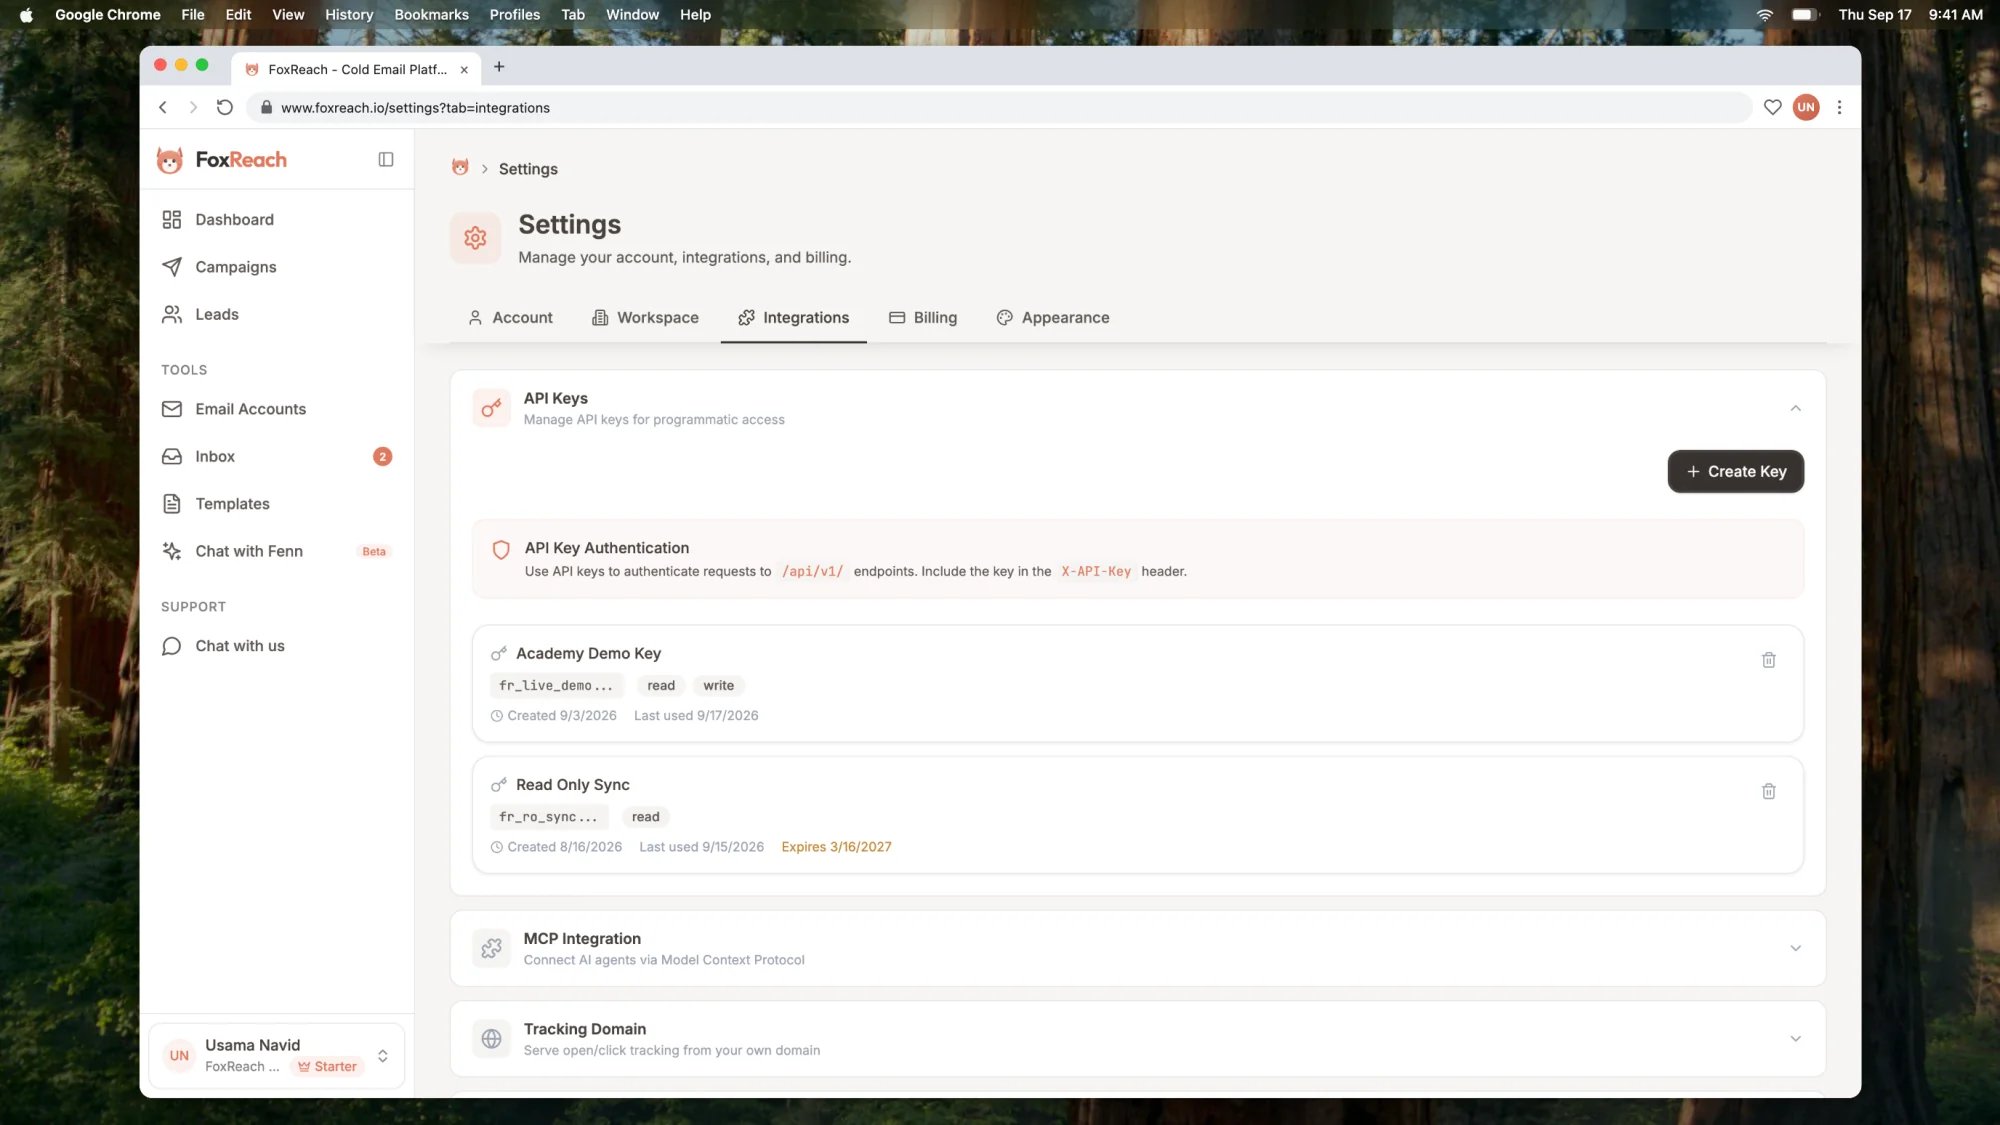
Settings > Integrations in FoxReach with the API Keys section expanded, showing the HubSpot sync key with its prefix, scopes, and created date
Step 2: Create a key and copy it once
Click Create Key. The Create API Key dialog has two fields. Key Name. A label so you can tell keys apart later. The placeholder suggests My Integration; type something specific, like “n8n production” or “Claude Code on my laptop”. Scopes. Two toggles, read and write, both selected by default. The dialog’s own definition is the one to remember: Read lets the key list and view resources. Write lets it create, update, and delete them. A reporting dashboard only needs read; an n8n workflow that creates leads and starts campaigns needs write too. At least one is required. Click Create Key. The dialog switches to API Key Created with a warning: Save your API key now, because this is the only time the full key will be shown. The key starts withotr_. Use the copy button, paste the key into your secret store or the credential field of the tool that will use it, and only then click Done.
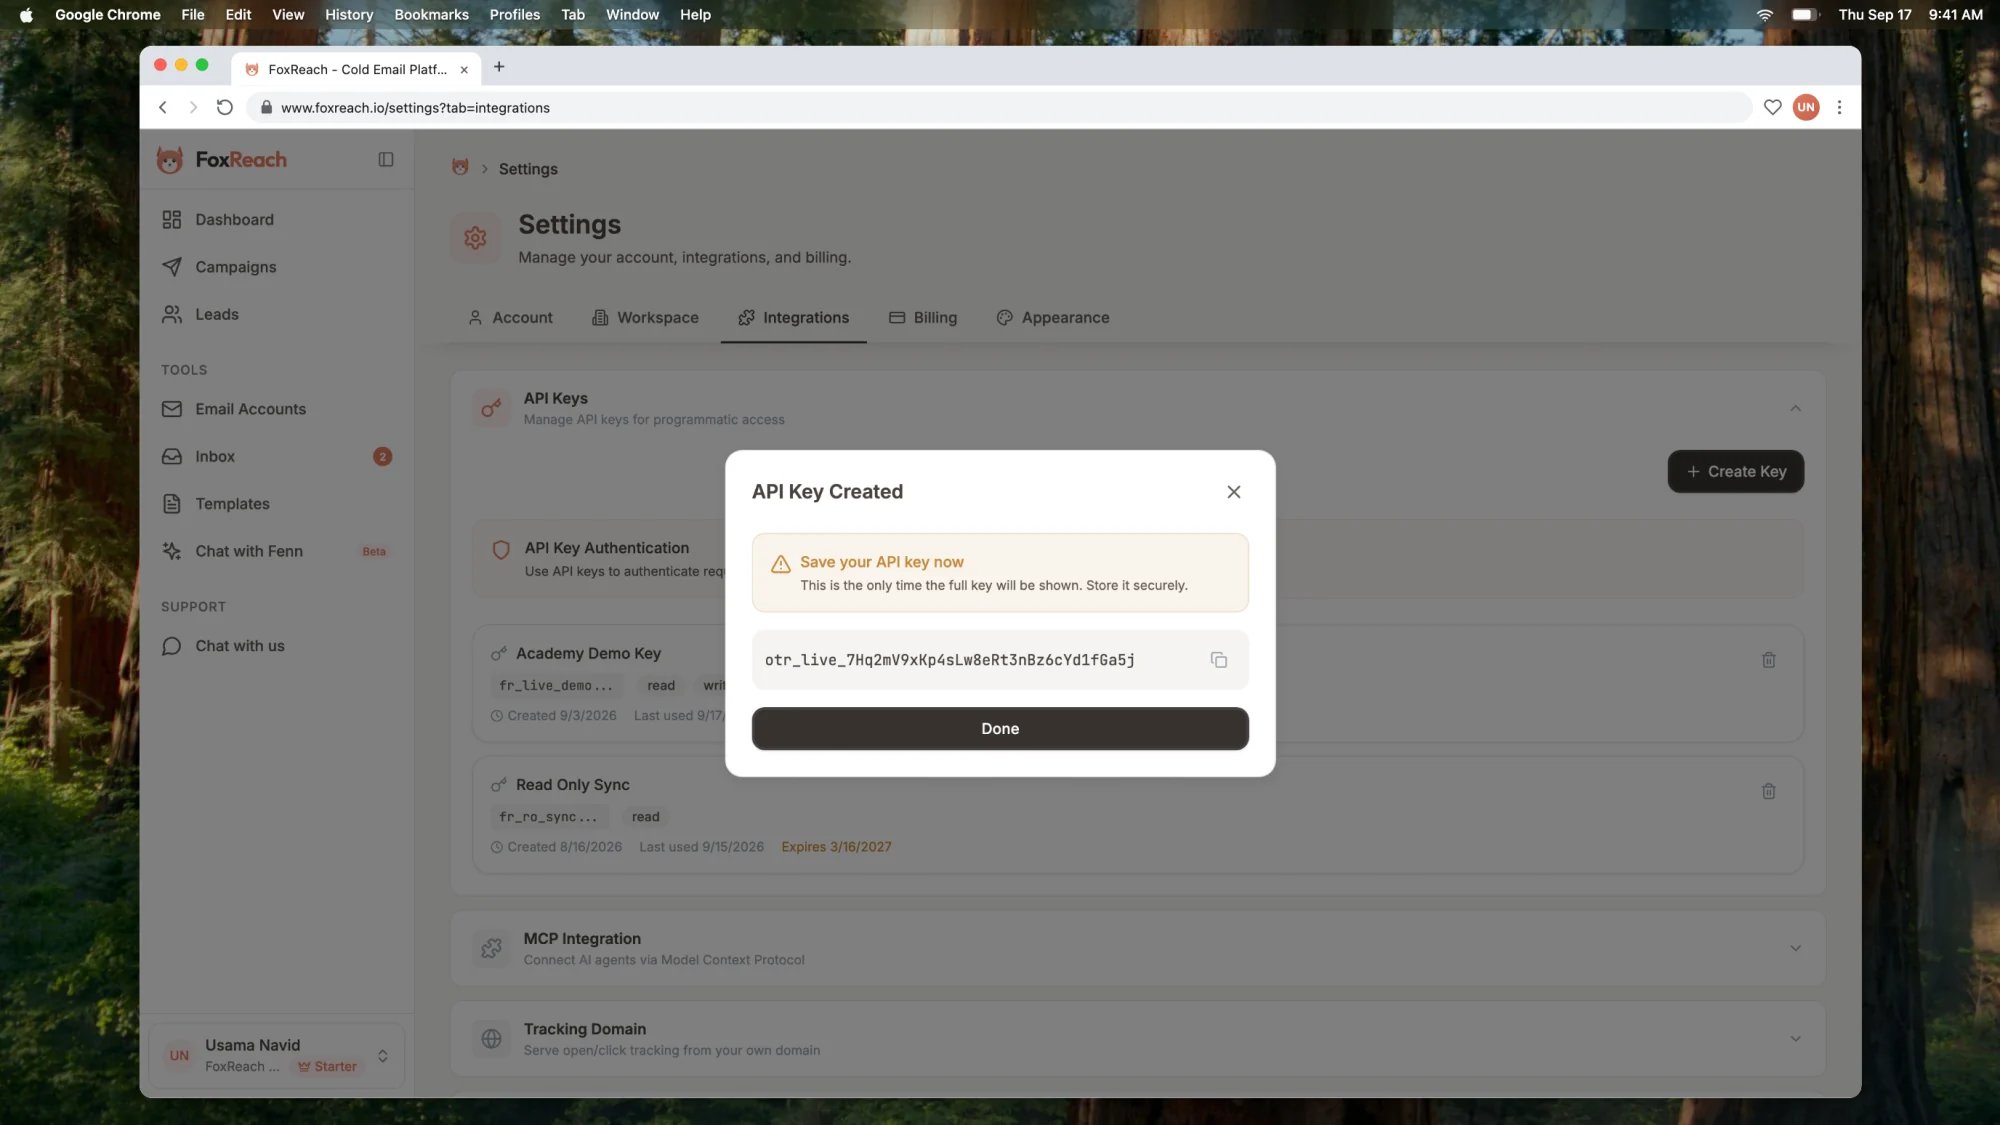
The API Key Created dialog in FoxReach showing the full HubSpot sync key once, with the copy button and the warning that it will not be shown again
Step 3: Make your first request
The base URL ishttps://api.foxreach.io/api/v1, and every request needs the X-API-Key header. This call lists the active campaigns in the key’s workspace, five per page:
GET /leads works the same way and accepts page, pageSize, search, status, and a comma-separated tags filter:
data field. List endpoints add a meta object with the page, page size, total count, and total pages:
error message, a code, and an optional details object. A missing, invalid, revoked, or expired key returns 401. A key without the scope an endpoint needs (a read-only key calling POST /leads, say) returns 403.
Rate limits. Each key can make 100 requests per minute. Every response carries X-RateLimit-Limit, X-RateLimit-Remaining, and X-RateLimit-Reset headers, and going over returns 429 with a Retry-After header telling you how many seconds to wait. The official SDKs and the CLI read that header and retry for you.
The full reference. The public OpenAPI document for the v1 surface is served at https://api.foxreach.io/openapi-public.json, and the rendered reference is at foxreach.io/docs. The same key works unchanged in the Python SDK, the TypeScript SDK, the CLI, and the Claude Code plugin.
Revoking a key. Each card in the API Keys list has a trash icon titled Revoke key. The confirmation says exactly what happens: any integration still sending this key stops working immediately, and the key cannot be restored. Create the replacement first, update the caller, then revoke the old one.
Step 4: Add a webhook and pick its events
Still on the Integrations tab, expand Webhooks and click Add Webhook. A sheet titled Add Webhook slides in with two parts. Endpoint URL. The HTTPS address FoxReach should POST to. In the video it ishttps://hooks.brightlane.co/foxreach; the demo workspace also has an older webhook at https://automation.buildberg.io/hooks/foxreach. It can be an n8n Webhook node, a Zapier catch hook, a Make custom webhook, or a route in your own service.
Events to subscribe. The event types are grouped as Email, Reply, Campaign, and Lead. Click a group’s checkbox to take all of its events, or click individual pills. Most teams start with reply.received, which fires when a lead writes back, and reply.categorized, which fires once FoxReach has classified that reply. The webhook in the screenshot also listens for campaign.started.
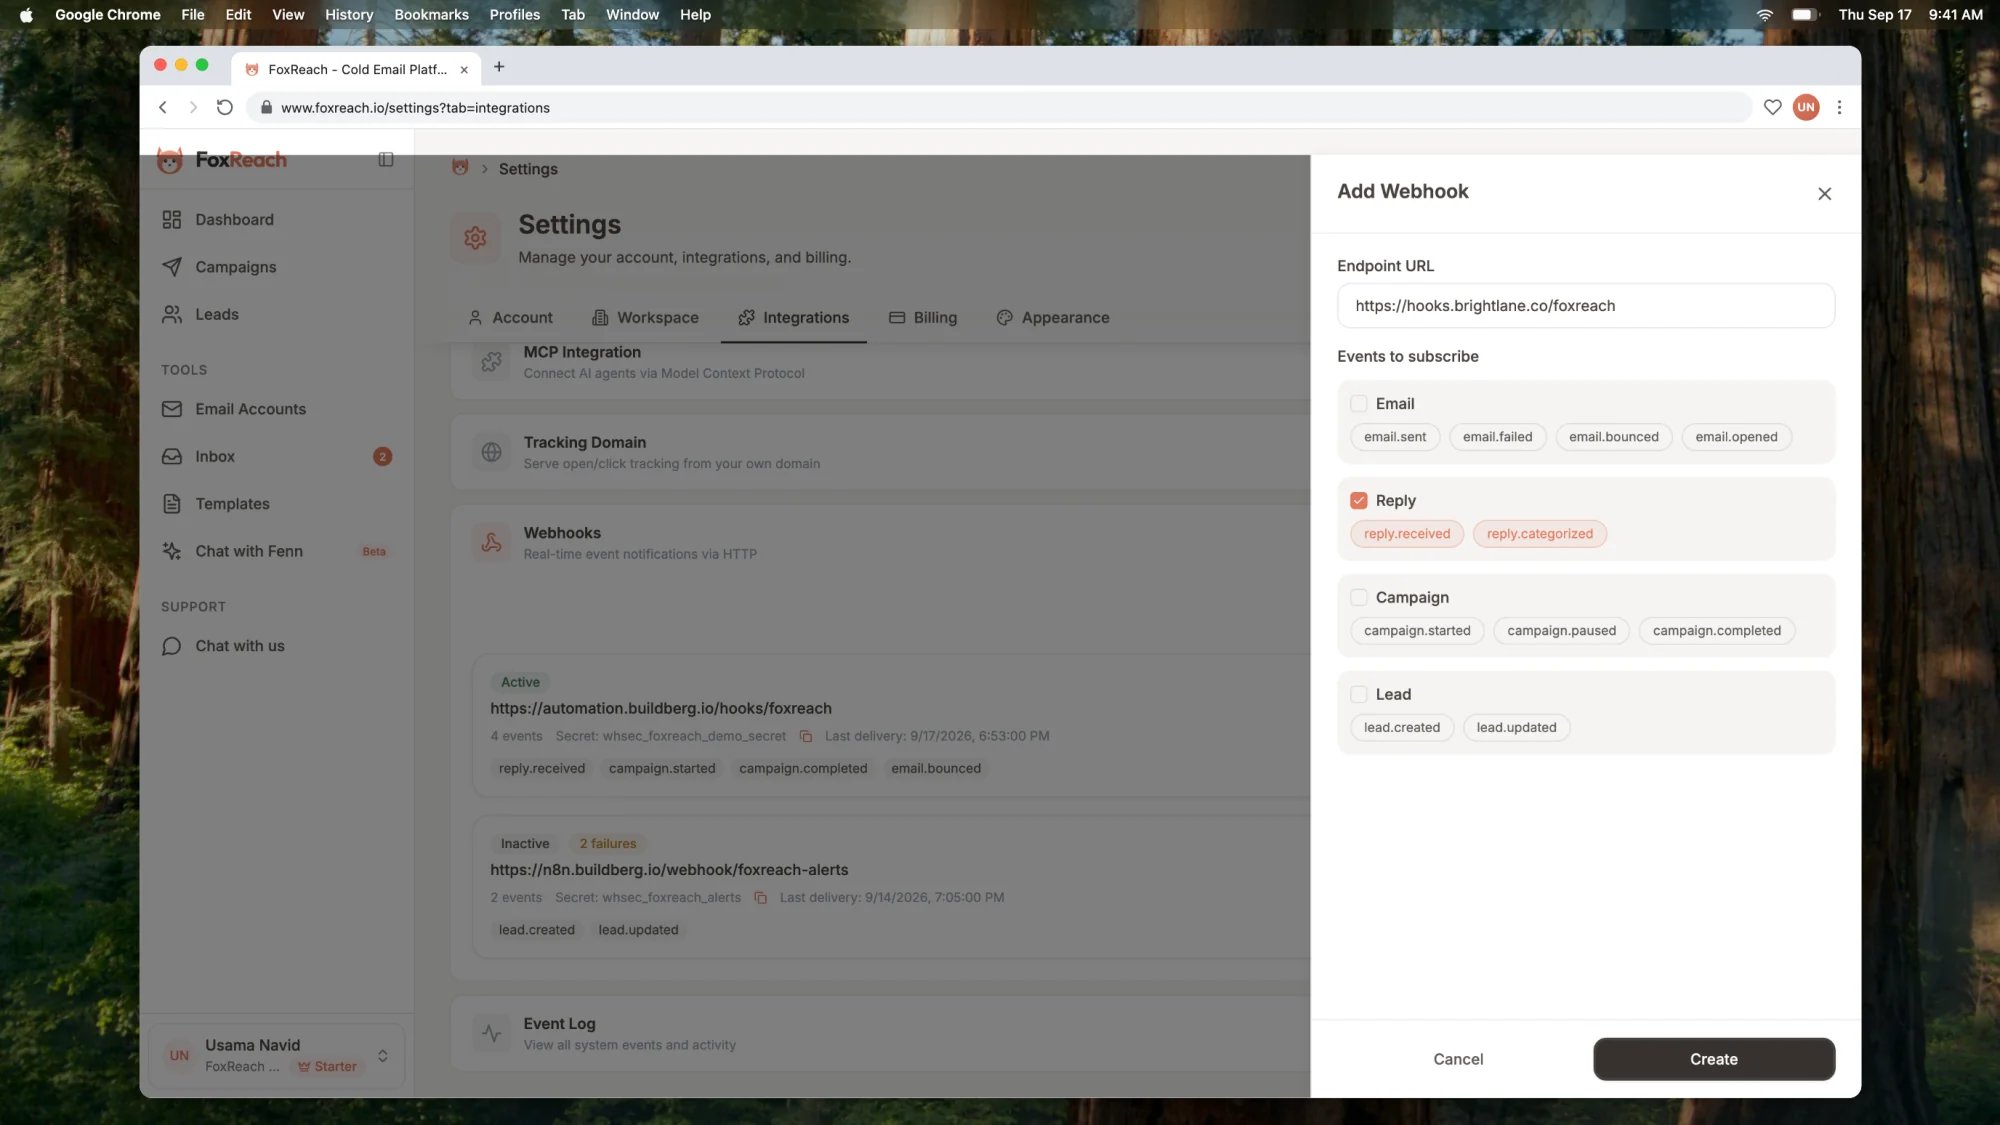
The Add Webhook sheet in FoxReach with the endpoint URL filled in and the reply.received, reply.categorized, and campaign.started events selected
Step 5: Save the signing secret and send a test
A Webhook Created dialog appears at once: Save your webhook secret. This is the only time the full secret will be shown. It is a 64-character hex string. Copy it into the same secret store as your API key and click Done. The secret is what makes the webhook trustworthy. Anyone who discovers your URL can POST JSON to it, but only FoxReach can produce a valid signature. After this dialog the card shows the secret masked down to its last characters, enough to confirm which one you hold. The new webhook sits at the top of the list as a card with an Active badge, its URL, the number of events, the masked secret, and icon buttons titled Test, Disable, Edit, Delete, and Deliveries. Click Test. FoxReach immediately sends a signed event of typewebhook.test with the payload {"message": "This is a test webhook delivery."} and waits up to ten seconds. If your endpoint answers with any 2xx status, a green line reads Test successful followed by the status code. Anything else shows Test failed with the status or the connection error.
Step 6: Read the Deliveries log
Click Deliveries on a webhook card to expand its Recent Deliveries panel. Each row is one event FoxReach tried to deliver: the delivery status, the event type, the HTTP status your endpoint returned, the attempt number, and the timestamp. Ten rows show at a time, with Previous and Next when there are more.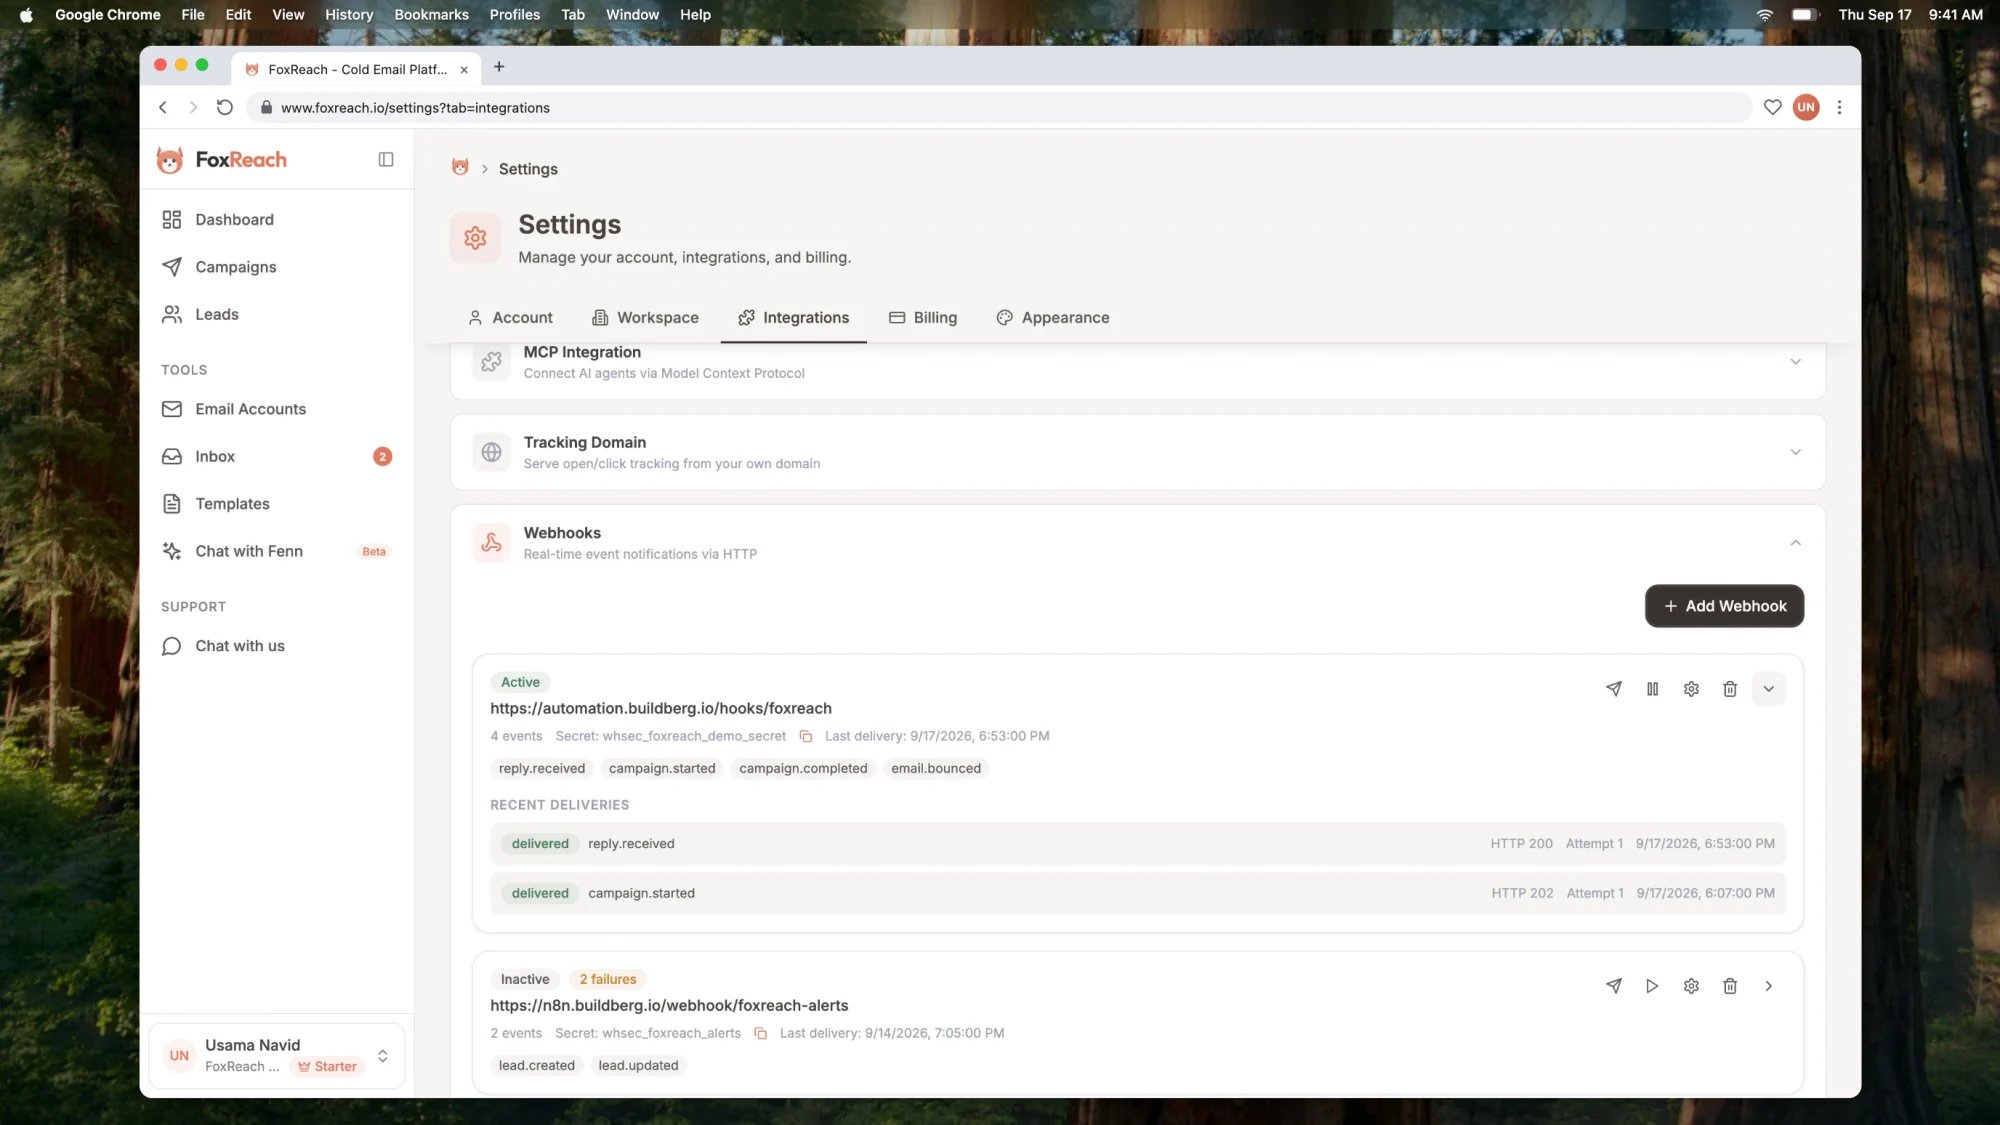
The Recent Deliveries panel for a webhook in FoxReach listing reply.received deliveries with their HTTP status codes and attempt counts
- Timeout. Each attempt waits ten seconds for a response.
- Retries. A non-2xx response or a timeout is retried after 60 seconds, then after 120 seconds: three attempts in total. Pending retries show as pending; after the third failure the row shows as failed.
- Consecutive failures. Every failed delivery adds one to the webhook’s consecutive failure count, shown as a warning badge on the card. A successful delivery resets it to zero.
- Auto-disable. After ten consecutive failed deliveries the webhook is switched to Inactive and stops receiving events. Fix the endpoint, then click Enable on the card; re-enabling resets the count.
Manage webhooks through the API
Everything above is available on the v1 API with the same key, which is how the n8n trigger node and the Zapier and Make apps register themselves when you activate a workflow:GET /webhooks/eventsreturns the valid event typesGET /webhookslists the workspace’s webhooksPOST /webhookscreates one and returns the plaintext secret in that response onlyPATCH /webhooks/{id}updates the URL, events, or active flagDELETE /webhooks/{id}removes it
Verify a webhook signature
Every delivery, including the test, is a POST withContent-Type: application/json and three custom headers:
id, type, payload, and timestamp. The signature is computed over the exact bytes of that body, so read the raw request body before any JSON parsing and compare digests with a constant-time function. HMAC is specified in RFC 2104; in Node the crypto module has everything you need:
X-Webhook-Signature, and the secret from Step 5. Return 401 if it fails; if it passes, respond 2xx quickly and do the real work afterwards so slow processing does not turn into retries. A reply.received payload carries the reply id, campaign id, lead id, sender email, subject, and a body preview, enough to fetch the thread through the API or route the lead in your CRM.
Events reference
Troubleshooting
401 from the API. The header is missing, misspelled, or the key is wrong. The header is literallyX-API-Key, not Authorization, and the value starts with otr_ with nothing around it. A revoked key also returns 401, so if a key stopped working overnight, check whether it is still listed under API Keys.
403 from the API. The key is valid but lacks the scope the endpoint needs. Read-only keys cannot create, update, or delete anything, and scopes cannot be changed on an existing key, so create a new one with write.
The API returns data, but not the data you expect. The key belongs to a different workspace than the one open in your browser. Switch to the workspace you meant and create the key there. One key, one workspace.
Webhook shows Inactive with a failures badge. The endpoint failed ten deliveries in a row and was disabled automatically. Expand Deliveries to see the HTTP codes it returned, fix the cause, and click Enable.
Signature mismatch. Almost always the body was parsed and re-serialized before hashing. Compute the HMAC over the raw bytes exactly as received, hex-encode it, and compare to the header. Also confirm you are using this webhook’s secret: every webhook has its own, and deleting and recreating one issues a new secret.
Test event never arrives. The test waits ten seconds, so a cold-starting function can time out; run it twice. If the test succeeds but no real events appear under Deliveries, open the Event Log. If the event is not there, the action did not happen in this workspace (replies only arrive for campaigns sending from an email account connected here). If it is there, confirm the webhook is subscribed to that event type and is Active.
Next step
With a key and a webhook in place, the rest is picking a client. The n8n integration guide wires the trigger node to these webhook events and the action node to the same key. For code, the Python SDK and TypeScript SDK wrap every endpoint above, webhooks included. If you want an AI assistant working in your workspace, the MCP integration guide uses Google sign-in rather than an API key, while the Claude Code plugin guide takes the key-based route. For CRM sync patterns, see connecting GoHighLevel to FoxReach. Every client and marketplace app is listed on the integrations page.Frequently asked questions
Where do I create an API key in FoxReach?
Where do I create an API key in FoxReach?
How do I authenticate a request to the FoxReach API?
How do I authenticate a request to the FoxReach API?
How does FoxReach sign webhook deliveries?
How does FoxReach sign webhook deliveries?
What happens when my webhook endpoint is down?
What happens when my webhook endpoint is down?
Can I create webhooks from code instead of the dashboard?
Can I create webhooks from code instead of the dashboard?