

Overview
The Model Context Protocol (MCP) is an open standard that lets AI assistants interact with external tools and data sources. FoxReach hosts an MCP server that gives AI agents like Claude and Cursor direct access to your outreach workspace - no local setup, no scripts, no middleware. Once connected, you can manage leads, campaigns, templates, and email accounts through natural conversation. Ask your AI assistant to “create a campaign to sell SEO services” and it will handle everything for you.Connect FoxReach to Claude, Cursor and Claude Code (MCP) (1 min)
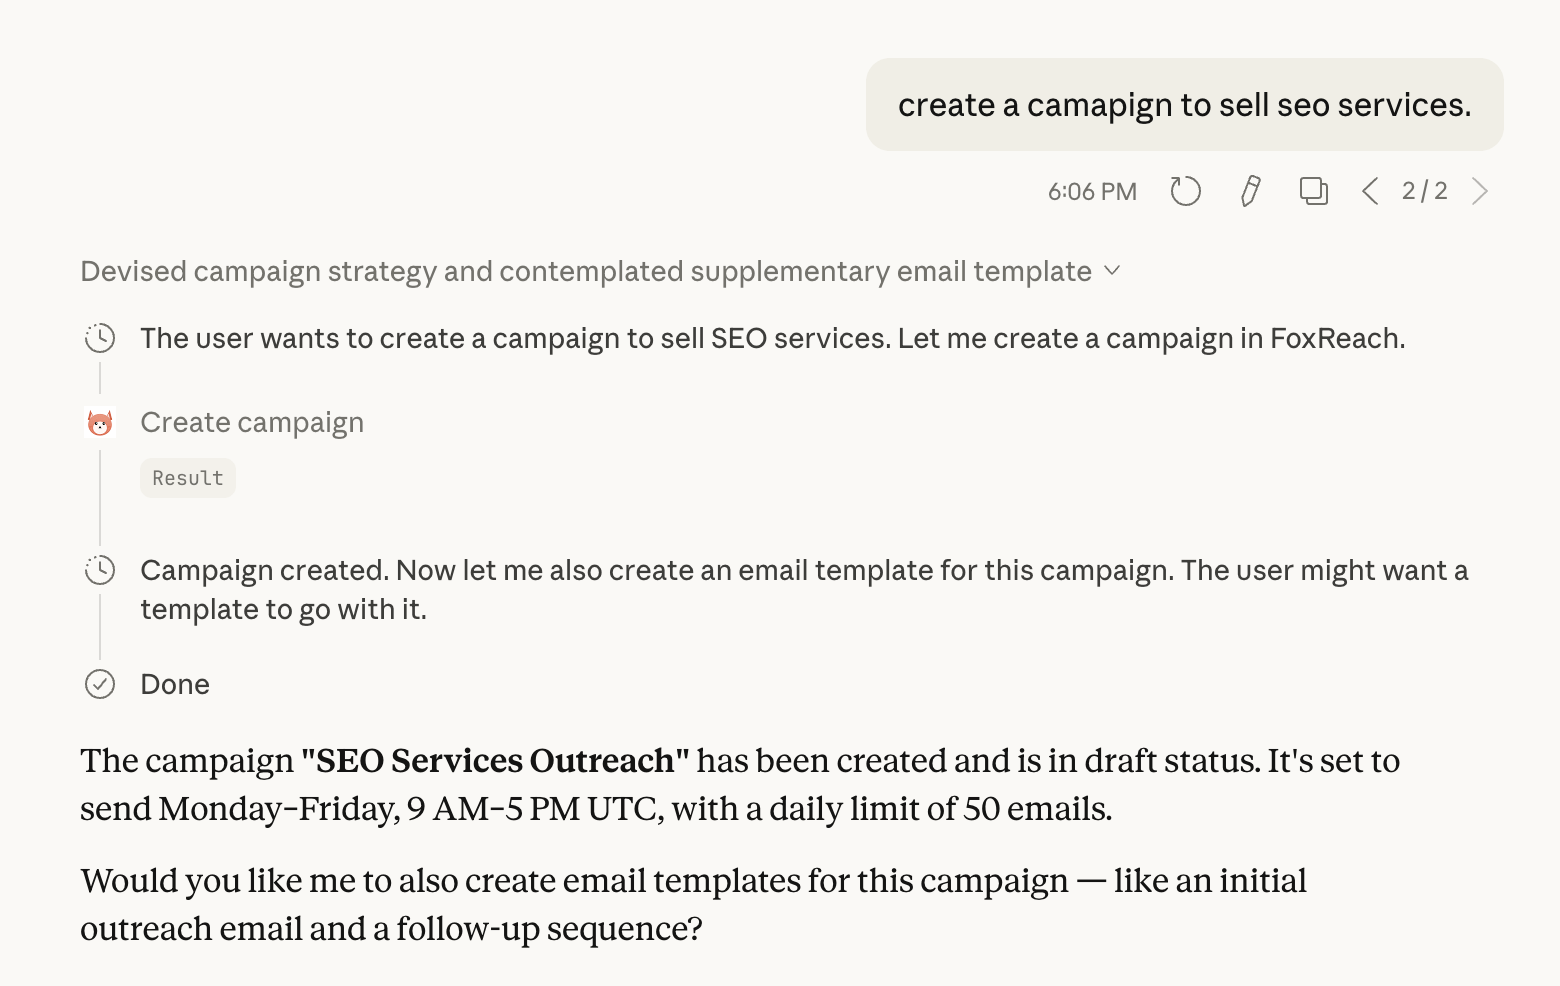
Claude Desktop using FoxReach MCP to create an SEO campaign
Prerequisites
- A FoxReach account with at least one workspace
- One of: Claude Desktop, Cursor, or Claude Code
Step 1: Connect Claude Desktop
Open Claude Desktop and go to Settings > Connectors. Click Add custom connector. EnterFoxReach as the name and this as the remote MCP server URL:
"url" entry in claude_desktop_config.json does not work for remote servers like FoxReach. Use mcp-remote, a small local proxy, instead (Node.js required). Open Settings > Developer > Edit Config and add:
mcp-remote opens your browser for the same FoxReach sign-in.
You’ll know it’s working when you see the MCP tools icon in the chat input area. Click it to see the 36 available FoxReach tools.
Step 2: Connect Cursor
In Cursor, go to Settings > MCP and click Add new MCP server. Configure it with the following JSON:Step 3: Connect Claude Code
If you use Claude Code (the CLI), run:/mcp inside Claude Code to complete the FoxReach sign-in. After signing in, all 36 FoxReach tools are available in your terminal sessions.
Other MCP clients, including ChatGPT connectors, work the same way: add https://api.foxreach.io/mcp as a remote MCP server and complete the FoxReach sign-in when the browser window opens.
How Sign-In Works
The MCP server does not use static API keys. When your client connects, FoxReach signs you in through its own OAuth flow and then mints a short-lived session key scoped to your personal workspace, so every tool call carries the same permissions and plan limits as the REST API. A few things worth knowing:- Session keys appear under Settings > API Keys as
MCP Session (...)entries. They expire on their own after 2 hours and renew automatically while the connection is in use. - Access lasts until you sign out everywhere from Settings or disconnect the client in your AI tool.
- MCP sessions are bound to your personal workspace. To let an agent work on a team workspace, use a workspace-scoped API key with the SDKs, the CLI, or the Claude Code plugin instead.
- If you connected before September 2026, when sign-in went straight to Google, your client will ask you to sign in to FoxReach once more. This happens one time.
Available Tools
FoxReach exposes 36 tools across seven categories. The same tools power Fenn, the AI co-pilot inside the app, so anything you can ask Fenn you can also ask Claude or Cursor - see Ask Fenn to build a campaign for the in-app version.Leads
Campaigns
Sequences (Campaign Steps)
Templates
Email Accounts
Analytics
Inbox
Example Workflow 1: Create a Full Campaign
You can set up an entire outreach campaign in a single conversation:“Create a campaign to sell SEO services. Add an initial outreach email and a follow-up for non-responders after 3 days.”Claude will call
create_campaign, then create_sequence twice - once for the initial email and once for the follow-up with a 3-day delay. All from a single prompt.
Example Workflow 2: Create Leads from a List
You have a list of prospects and want to add them to FoxReach. Just paste them into Claude:“Add these leads to FoxReach:Claude will call
- sarah@techcorp.io, Sarah Chen, TechCorp, VP Engineering
- mike@startupco.com, Mike Johnson, StartupCo, CEO
- lisa@enterprise.com, Lisa Wang, Enterprise Ltd, Head of Sales”
create_lead for each one, mapping the fields automatically.
Example Workflow 3: Check Campaign Performance
Ask Claude about your campaigns:“Show me all my active campaigns and their details.”Claude will call
list_campaigns with the active status filter, then get_campaign for each to show you sequence steps and stats.
Example Workflow 4: Draft and Create a Template
Let your AI assistant write outreach copy:“Write a cold outreach email template for SaaS founders. It should mention a pain point about manual lead management and pitch FoxReach as the solution. Use personalization variables for first name and company. Save it as a template called ‘SaaS Founder Outreach v1’.”Claude will draft the email with
{{first_name}} and {{company}} variables, then call create_template to save it directly to your workspace.
Tips
- Start with read-only queries. Use
list_leads,list_campaigns, andget_campaignto explore your data before making changes. - Be specific with destructive actions. When asking to delete or pause something, include the name or ID so there’s no ambiguity.
- Reconnect if calls start failing. If tool calls stop working after a long session, remove and re-add the FoxReach server in your client to run the FoxReach sign-in again.
Troubleshooting
Tools not showing up? Double-check that the URL in your config ishttps://api.foxreach.io/mcp. Restart your client after making config changes.
Sign-in window doesn’t open?
Make sure your default browser is set and that pop-ups aren’t blocked for the sign-in URL.
Getting “401 Unauthorized” errors?
Your session has expired or the stored tokens are stale. Clear the FoxReach connection in your MCP client and reconnect to sign in again.
Getting “No FoxReach account found” errors?
The account you signed in with has no FoxReach workspace. Sign in with the email you use for FoxReach, or create an account first.
Connection issues?
Your client will reconnect automatically if the connection drops. If issues persist, try removing and re-adding the MCP server in your client settings.
What’s Next
- Read the MCP server product page for the full picture of what agents can do in FoxReach
- Explore the full API documentation for details on every endpoint
- Set up webhooks to react to email events in real time
- Check out the n8n integration for workflow automation
- Questions? Reach out via our contact page
Frequently asked questions
Do I need an API key to use the FoxReach MCP server?
Do I need an API key to use the FoxReach MCP server?
No. The MCP server authenticates with OAuth, with FoxReach itself as the identity provider. Your AI client opens a browser window on the FoxReach sign-in page, you sign in with Google, an emailed sign-in link, or your email and password, and click Allow. FoxReach then mints a short-lived session key behind the scenes. It shows up under Settings > API Keys as an MCP Session entry and expires on its own after 2 hours.
Which AI clients work with the FoxReach MCP server?
Which AI clients work with the FoxReach MCP server?
Claude Desktop, Cursor, and Claude Code are documented step by step in this guide. Any other client that supports remote MCP servers, including ChatGPT connectors, works the same way: give it https://api.foxreach.io/mcp as the server URL and complete the FoxReach sign-in when the browser window opens.
How many tools does the FoxReach MCP server expose?
How many tools does the FoxReach MCP server expose?
36 tools across seven categories: leads, campaigns, sequences, templates, email accounts, analytics, and inbox. They cover the full outreach loop, from creating leads and building a campaign sequence to reading replies and sending a response. The same tools power Fenn, the AI co-pilot inside the FoxReach app.