

Overview
The FoxReach n8n community node lets you connect FoxReach to hundreds of other apps - CRMs, spreadsheets, Slack, webhooks, and more. Create leads from form submissions, add them to campaigns automatically, and react to replies in real time. This guide walks you through installation, setup, and three practical workflows you can build today. n8n is one of several ways to plug into FoxReach; the integrations page lists the others, including the SDKs, the CLI, and the MCP server.Prerequisites
Before you start, make sure you have:- A FoxReach account with an API key (Settings > Integrations > API Keys)
- An n8n instance (self-hosted or n8n Cloud)
- At least one connected email account and a campaign in FoxReach
Step 1: Install the Node
In your n8n instance, go to Settings > Community Nodes, click Install, and enter the package name:- FoxReach - The action node. It exposes eight resources: Lead, Campaign, Sequence, Template, Email Account, Inbox, Analytics, and Webhook
- FoxReach Trigger - Start workflows when events happen (replies, bounces, opens, campaign status changes, lead changes)
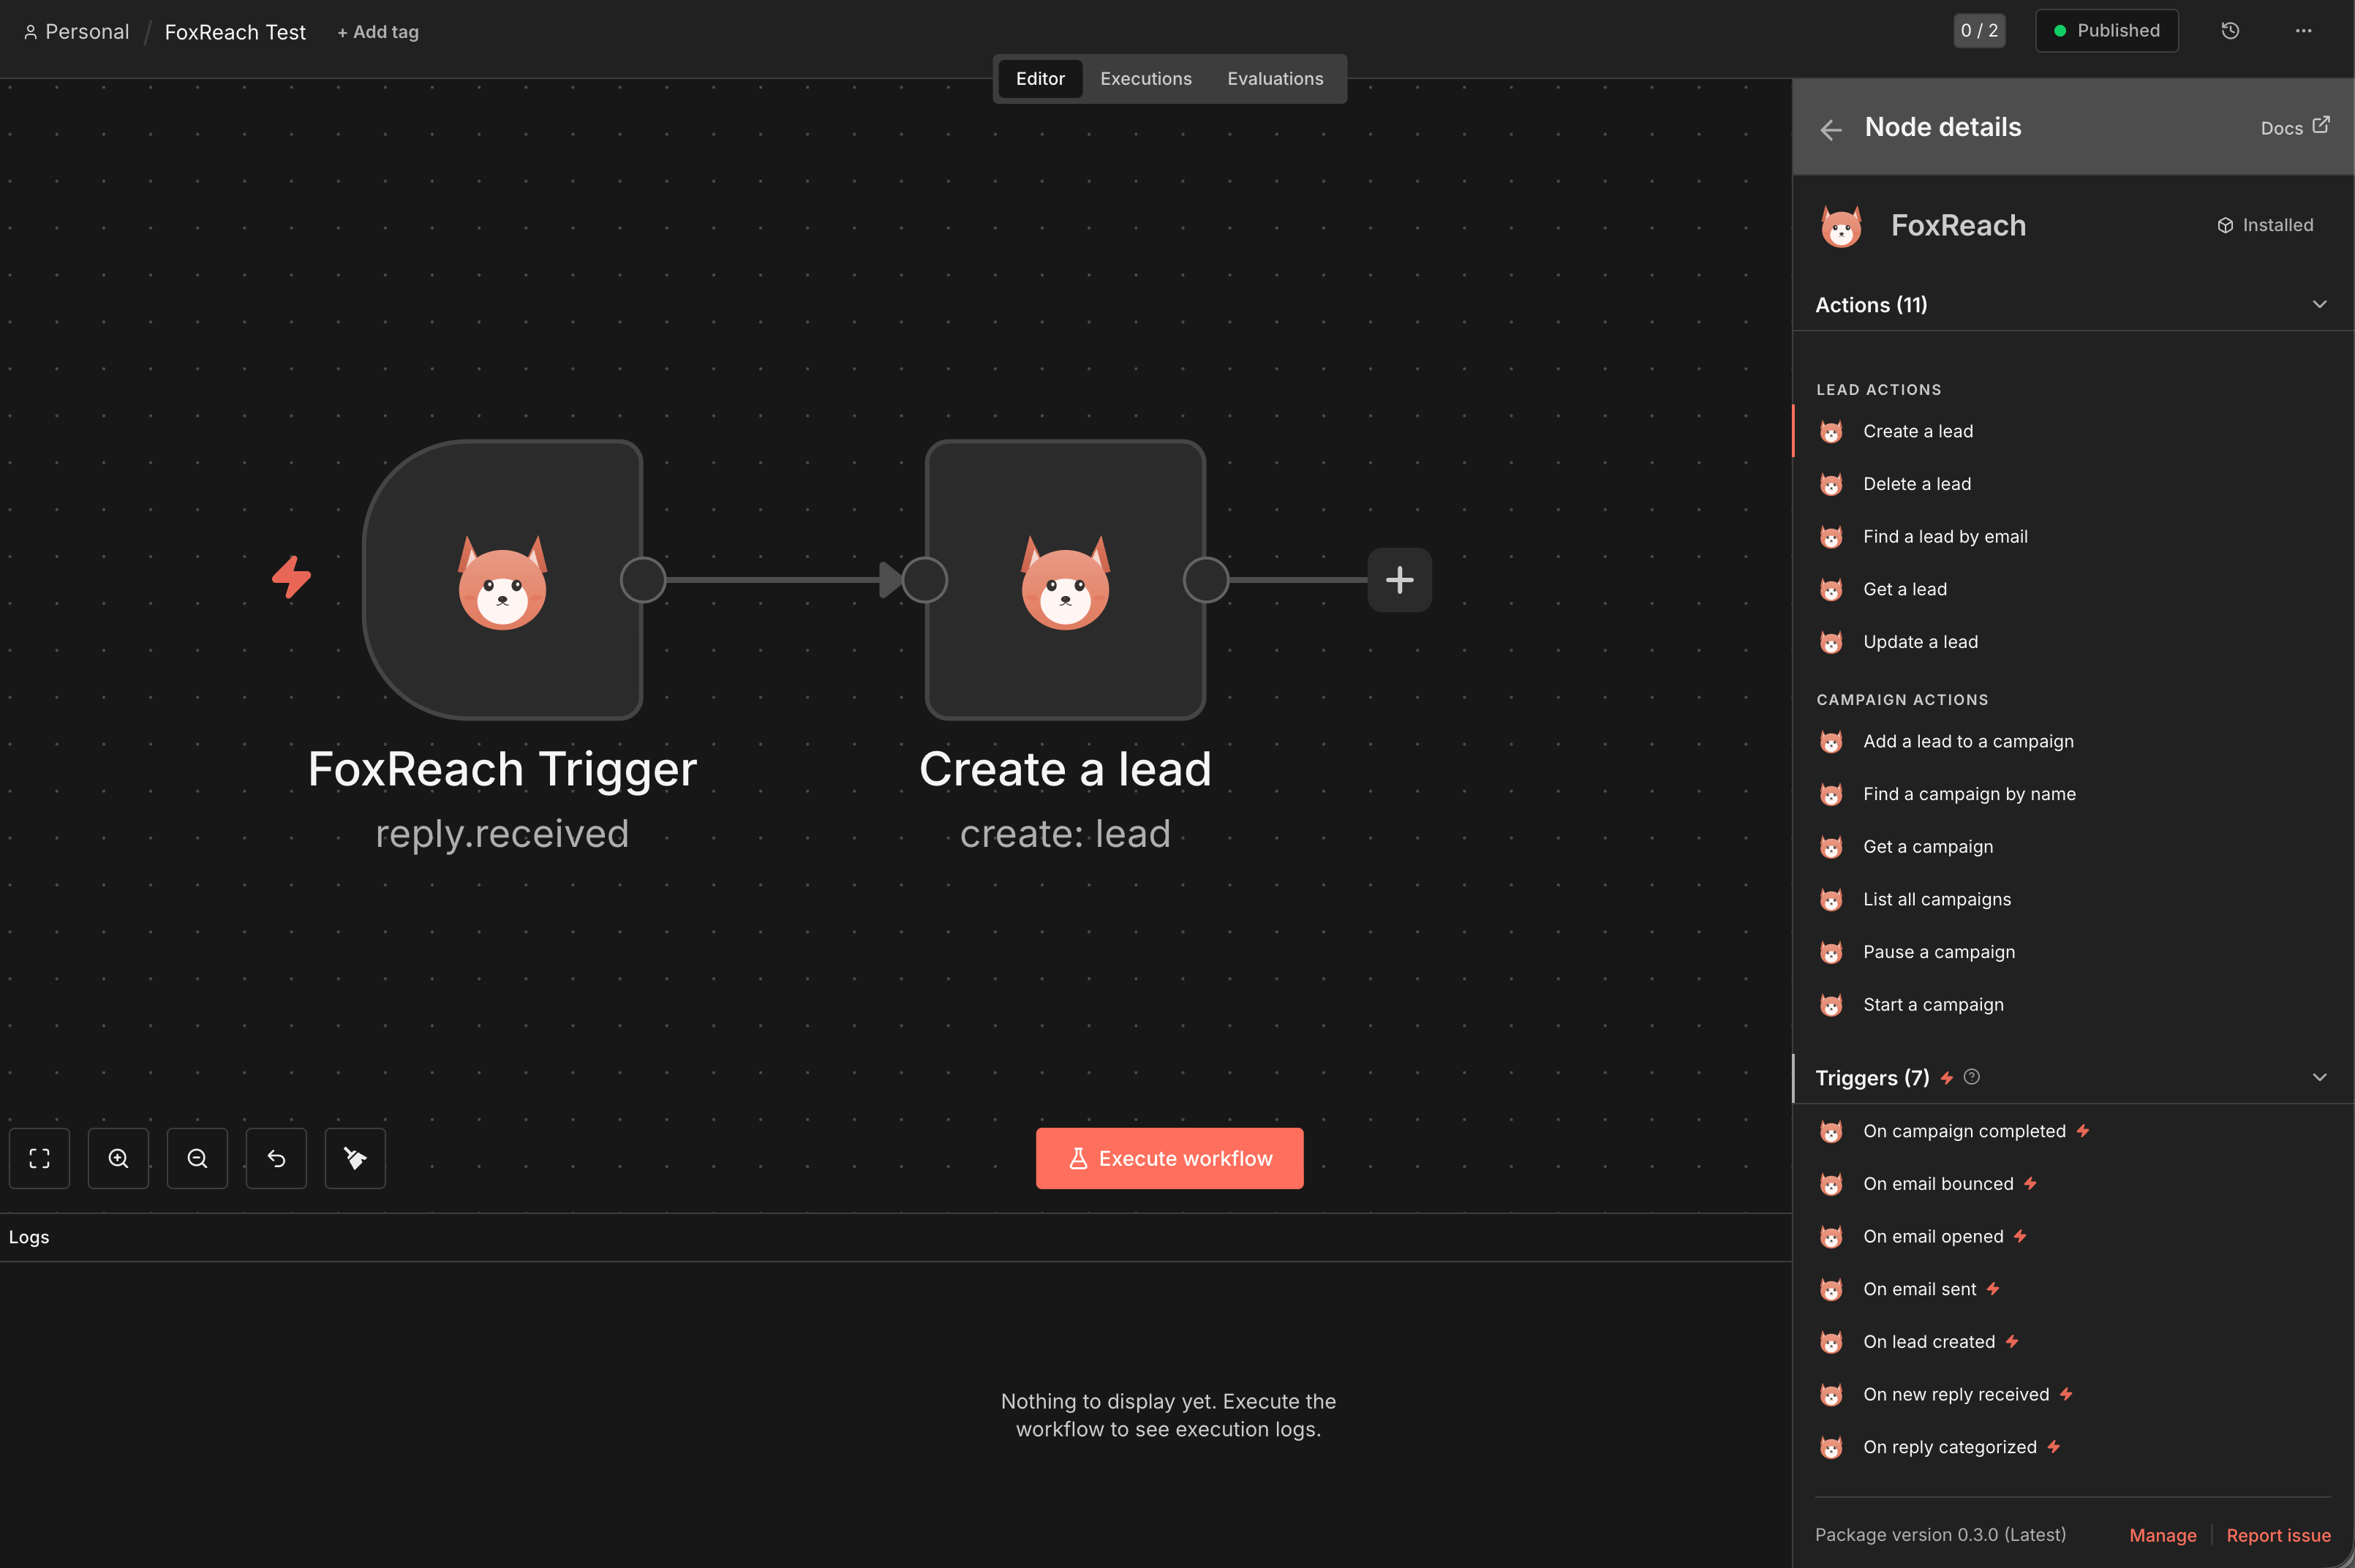
FoxReach node in n8n showing the available actions and triggers
If you’re self-hosting n8n, you can also install via CLI: npm install n8n-nodes-foxreach in your n8n root directory and restart.
Step 2: Connect Your API Key
- Open any FoxReach node on the canvas
- Click Create New Credential under the FoxReach API credential
- Paste your API key (starts with
otr_...) - Click Save - n8n will verify the connection
X-API-Key header on every request.
You can generate API keys in FoxReach under Settings > Integrations > API Keys. Click Create API Key, give it a name, and keep both the read and write scopes selected. The trigger node needs write access to register its webhook, and the full key is only shown once in the API Key Created dialog.
Available Operations
Lead Operations
Campaign Operations
Other Resources
The node has grown beyond leads and campaigns since the first release. The remaining resources cover the rest of the API surface:Trigger Events
The FoxReach Trigger node starts your workflow when these events occur:
Two notes on the event list:
- Email Opened only fires for campaigns that have Track opens switched on in the campaign settings, and FoxReach adds the open pixel from the second step of a sequence onwards, never on the first cold email. Enable Track link clicks the same way if you want click data.
- The API also has an
email.clickedevent. The trigger node does not list it, so if you need it, subscribe with the FoxReach node’s Webhook > Create operation and point the URL at an n8n Webhook node.
eventId, eventType, and timestamp plus every field of the event payload at the top level.
Workflow 1: Sync New CRM Contacts to FoxReach
Automatically create leads in FoxReach whenever a new contact is added to your CRM. Nodes:- CRM Trigger (e.g., HubSpot, Pipedrive, or Google Sheets) - fires when a new contact is created
- FoxReach > Create Lead - creates the lead with mapped fields
- FoxReach > Add Lead to Campaign - adds them to your outreach campaign
- Add your CRM trigger node and connect it
- Add a FoxReach node, set Resource to Lead and Operation to Create
- Map the fields from your CRM: Email, First Name, Last Name, Company
- Add another FoxReach node, set Resource to Campaign and Operation to Add Lead
- Enter the Campaign ID and connect the Lead ID from the previous step
Workflow 2: Notify Slack on Interested Replies
Get instant Slack notifications when a prospect shows interest. Nodes:- FoxReach Trigger - set event to Reply Categorized
- IF Node - filter where category equals “interested”
- Slack > Send Message - post to your sales channel
- Add the FoxReach Trigger node, select Reply Categorized
- Add an IF node: check if
categoryequalsinterested - On the true branch, add a Slack node with a message template:
replyId, fromEmail, subject, accountId, campaignId, and category. If you want the campaign name in the message, add a FoxReach > Campaign > Get node between the IF node and Slack and read name from its output.
Workflow 3: Auto-Pause Campaign on High Bounce Rate
Protect your sender reputation by pausing campaigns that are bouncing too much. Nodes:- FoxReach Trigger - set event to Email Bounced
- FoxReach > Get Campaign - fetch current campaign stats
- IF Node - check if bounce rate exceeds threshold
- FoxReach > Pause Campaign - pause it automatically
- Add the FoxReach Trigger with Email Bounced event
- Add a FoxReach node to get the campaign details using the
campaignIdfrom the trigger - Add an IF node: divide
totalBouncedbytotalSentfrom the campaign response and check if the result is above your threshold (e.g., 0.05 for 5%) - On the true branch, add a FoxReach node with Pause operation
Tips
- Test with a single lead first. Before connecting a large data source, run your workflow manually with one item to verify field mapping.
- Use the Find operations. Before creating a lead, use Find by Email to check if they already exist. This prevents duplicates.
- Set up error handling. Add an Error Trigger workflow to catch failures - e.g., if a lead’s email is already taken, the API returns a 409 conflict.
- Rate limits. The FoxReach API allows 100 requests per minute. For bulk imports, use the Lead > Bulk Import operation, or use n8n’s batch processing with a wait node between batches.
Troubleshooting
“401 Unauthorized” error Your API key is invalid or expired. Generate a new one in FoxReach under Settings > Integrations > API Keys. “404 Not Found” on campaign operations The campaign ID doesn’t exist or belongs to a different workspace. Double-check the ID in FoxReach. API keys are workspace-scoped, so a key from one workspace cannot see another workspace’s campaigns. Trigger not firing Make sure the workflow is active (toggled on). FoxReach registers a webhook when you activate the workflow and removes it when you deactivate. Re-activating with the same URL and event returns the existing webhook instead of creating a duplicate, so you will not get double deliveries from toggling a workflow on and off. Trigger stopped firing after working for a while If your n8n endpoint stops answering with a 2xx, FoxReach retries each delivery after 60 seconds and again after 120 seconds, then marks it failed. After ten consecutive failed deliveries the webhook is disabled automatically. Open Settings > Integrations > Webhooks in FoxReach, check Recent Deliveries on the webhook, fix the endpoint, then click Enable or deactivate and reactivate the workflow. Duplicate leads The API returns a 409 error if a lead with the same email already exists. Use the Find by Email operation first, or handle the error with a try/catch pattern in n8n.What’s Next
The n8n node is currently in beta. We’re actively adding more operations and improving the experience. Zapier and Make.com apps are listed as Planned on the integrations page; until they ship, both platforms can call the FoxReach API through their generic HTTP modules and receive FoxReach webhooks through their custom webhook triggers.- Full API documentation: foxreach.io/docs
- Creating keys and webhooks in the dashboard: API keys and webhooks tutorial
- Questions? Reach out via our contact page
Frequently asked questions
What is the name of the FoxReach n8n node?
What is the name of the FoxReach n8n node?
The npm package is n8n-nodes-foxreach. Installing it adds two nodes to your n8n canvas: FoxReach, the action node with Lead, Campaign, Sequence, Template, Email Account, Inbox, Analytics, and Webhook resources, and FoxReach Trigger, which starts a workflow when a FoxReach event such as a reply or a bounce happens.
Which FoxReach events can start an n8n workflow?
Which FoxReach events can start an n8n workflow?
The FoxReach Trigger node lists eleven events: New Reply Received, Reply Categorized, Email Sent, Email Failed, Email Bounced, Email Opened, Campaign Started, Campaign Paused, Campaign Completed, Lead Created, and Lead Updated. Email Opened only fires for campaigns that have Track opens switched on, and the open pixel is added from the second step of a sequence onwards.
Where do I create the API key for n8n?
Where do I create the API key for n8n?
In FoxReach, open Settings, click the Integrations tab, expand API Keys, and click Create API Key. Give the key a name and keep both the read and write scopes selected, because the trigger node needs write access to register its webhook. The full key, which starts with otr_, is shown once. Paste it into the FoxReach API credential in n8n.
Why does my FoxReach Trigger workflow stop firing?
Why does my FoxReach Trigger workflow stop firing?
The trigger registers a webhook in FoxReach when you activate the workflow and removes it when you deactivate. If your n8n URL stops answering with a 2xx, FoxReach retries each delivery three times and disables the webhook after ten consecutive failed deliveries. Check the Recent Deliveries list under Settings > Integrations > Webhooks, fix the endpoint, and re-enable the webhook or reactivate the workflow.